
Audiomatica Open Source Talkbox
Document version 06-08-2024 – This page is a work in progress
This page provides detailed instructions and resources to assist individuals in building and replicating the Audiomatica Open Source Talkbox. The Project is provided “as-is” and without warranty of any kind, either expressed or implied. While we make efforts to ensure accuracy and provide thorough documentation, we do not guarantee the functionality, safety, or fitness for a particular purpose. We do not assume any liability for any damage, injury, or loss that may occur as a result of building or using the hardware based on the instructions provided. The Project may involve the use of tools, materials, and processes that can pose risks. Users should exercise caution and adhere to proper safety procedures. We are not responsible for any accidents, injuries, or damage that may occur during the construction or use of the turntable. Users are allowed and encouraged to modify and adapt the device for their specific needs. However, any such modifications are at the user’s own risk, and we do not take responsibility for the performance, safety, or suitability of modified versions of the hardware.
This work is licensed under a Creative Commons Attribution-ShareAlike 4.0 International License.

The Audiomatica Open Source Talkbox is not sold as a kit or commercial product.
Preface
There are many practical cases where the measurement of the Speech Transmission Index (STI) requires an electroacoustic source with characteristics similar to those of a human talker. An example is described in our application note “Speech Intelligibility Assessment Using CLIO 11”. There are several possibile choices for the source, such an artificial head with or without torso or an artificial mouth. The IEC 60268-16:2020 standard also suggest the possibility to use a simple small loudspeaker. This device, referred to as a “talkbox” by the IEC standard, is commonly employed for such purposes.
Here, we present an inexpensive talkbox solution in the form of a 3D-printed loudspeaker, which can be used with our CLIO system to replace commercial devices. The design is released as open source, allowing anyone to download the .STL files, modify them as desired, and print the device. While commercial talkbox solutions are available on the market, they are usually quite expensive and cannot be customized for specific needs. Alongside the 3D-printed loudspeaker, we also demonstrate a method for the linearization of the talkbox or any other small loudspeaker according to the IEC standard by pre-distortion of the STI speech spectrum.
The latest version (fifth edition) of the standard recommends that the talkbox have an opening size of less than 65 mm, whereas the previous version (fourth edition) specified an opening size of less than 100 mm. This change rules out the possible usage of many commercial professional small “cube” loudspeakers, which typically use drivers ranging from 3” to 4”.
This project has been also presented at the 156th AES Convention in Madrid:
An open source 3D printed talkbox for speech intelligibility measurements
(Express Paper, 156st AES Convention, June 2024, by Daniele Ponteggia – 904kB Pdf)
Talkbox build
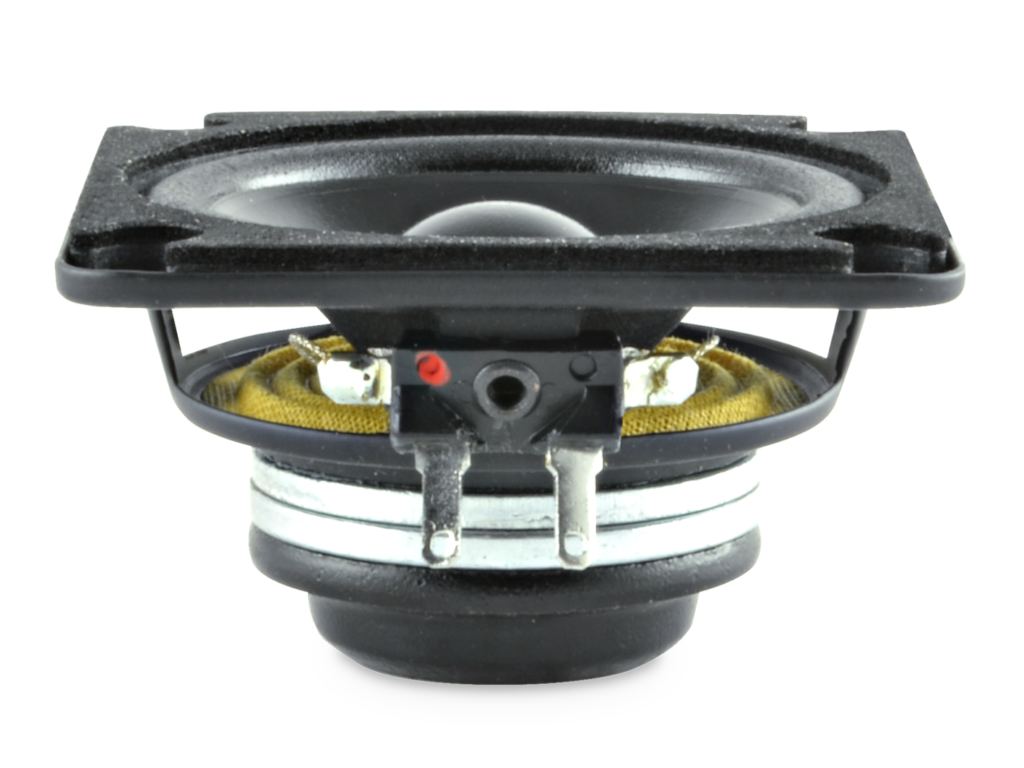
We started by identifying a suitable loudspeaker driver: the Sica 2.5-inch Hi-Fi/studio monitor. This component meets the required characteristics and should be easily sourced from online resellers.
https://sica.it/prodotto/2-5-h-0-8-sl/
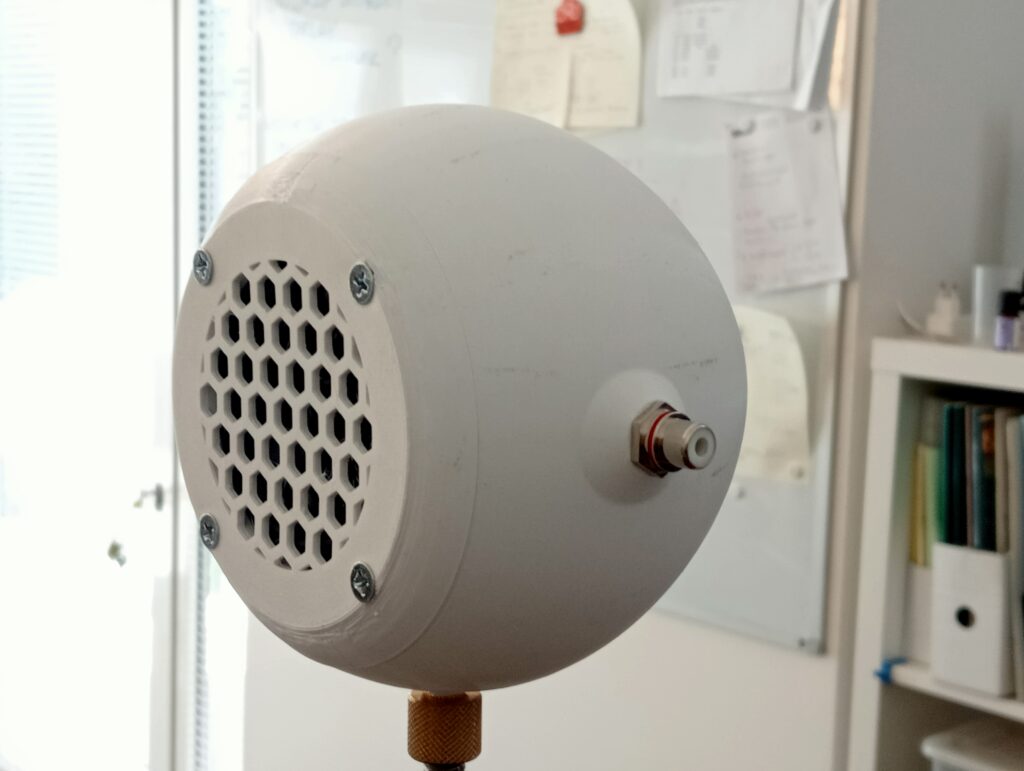
We then designed a low-diffraction, drop-shaped small closed-box enclosure around this loudspeaker. The box features a protective front grille, a hole for an RCA connector, and a receptacle that can accommodate a brass insert for a 1/4” screw.
The loudspeaker body is composed of two 3D printed parts, the box and the cover/grille:
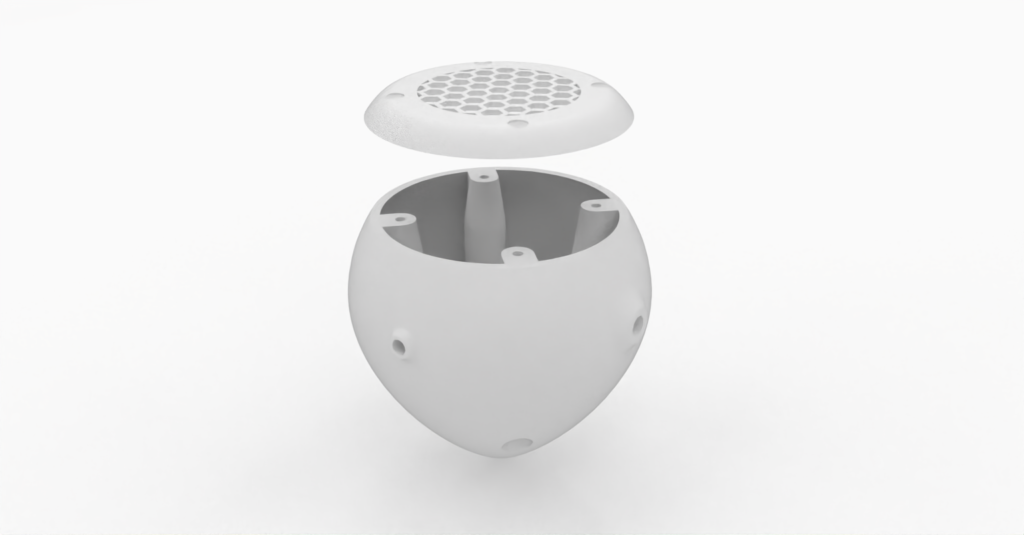
3D Printed plastic parts:
The .stl files of the parts to be printed are available at the following link:
Other parts:
A complete explosion of parts is shown:
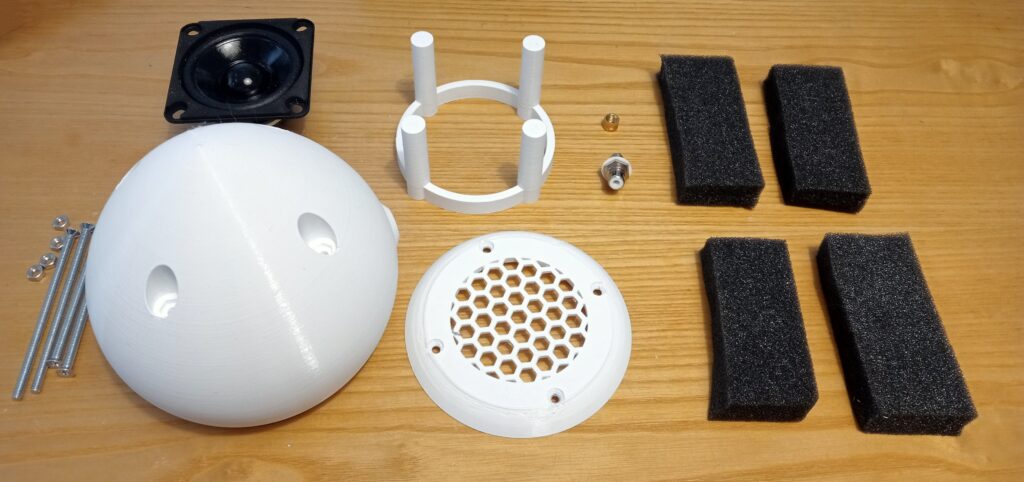
1 x Sica 2,5 H 0,8 SL loudspeaker
1 x RCA female connector (panel)
1 x 3D printed rear box
1 x 3D printed front/grille
1 x 3D printed stand (optional)
1 x 1/4” brass insert
4 x M4 70 mm screws with nuts
4 x polyester foam inserts
1 x RCA to loudspeaker connection cables (not shown)
Device assembly
The assembly is straightforward. First the brass insert should be fixed to the rear box by inserting it while heated in the receptacle printed in the box. Then the RCA needs to be bolted in the rear box hole and two short cables should be soldered to the connector and the loudspeaker terminals. At this point the foam insert can be placed inside the walls of the rear box and the loudspeaker can be then placed on the front baffle. Finally the front and rear parts can be assembled inserting the four screws and gently tightening. Be sure that the nuts are holded in place in their receptacle in the outer part of the rear box assembly.
To get more information on how to use the Open Source Talkbox please refer to our application note Speech Intelligibility Assessment Using CLIO 11 and paper An open source 3D printed talkbox for speech intelligibility measurements.